Introduction
Having the right tools for the job is essential for builders, painters and personal trainers and this is no exception for chefs. Whether professional or at home, an adventurous cook or those just starting out, the most practical and most used tool in a kitchen is a knife. While it may seem pretty straightforward as to how to choose the best knife or how to cut, there are actually dozens of considerations to take on board. Luckily for you, we have decades of experience in this field and have collected all the information you need before you set out not only to buy the best knives on the market but to buy the best knives for you. We’ve cut through all the bull and sliced away the ‘non-importants’ to leave you with the best guide for buying top-quality knives. We’ve answered every single question we can think of in this blog, so if you’re left with a burning question unanswered, please let us know!
Knife Anatomy - Get to know your knife
A kitchen knife is essentially an extension of your hand, so to start off with, let’s understand the anatomy of a knife. You’ll notice there are quite a few human-related terms further proving the point a knife truly is part of the chef.

These graphics are designed by the German knife manufacturer WÜSTHOF
The cutting edge or also grind & belly

The cutting edge is the long, sharpened part of the blade that does most of your cutting tasks such as dicing, slicing, chopping & mincing. Knives that are curved up to the tip have a ‘belly’. This part is good for carving and slicing. A curved edge also assists with the rock cut technique
The tip and the point

When it comes to the finishing touches in preparation, the knife tip is your choice. Cut and chop onions, mushrooms, garlic or other small vegetables. Perfect for delicate cutting tasks that require great detail
The end of the blade – heel or bit

This area of the cooking knife can be used for food that is difficult to cut. Because the transfer of weight is greatest here, reducing your effort. With a full-bolster knife, the bit also protects the fingers while working.
Blade spine

Ground absolutely smooth, or “burred” in technical terms, a significant sign of quality. It is broader than the cutting edge and is suitable for cracking shellfish or nuts, bruising lemongrass, scaling a fish or gathering ingredients into a pile.
Blade surface

The blade is well suited for shaping and flattening foods as well as for picking up and transporting what you have cut.
Bolster
The bolster is the joining of the knife handle to the blade. You can get knives with a full bolster, which carries all the way down to the heel or knives with a half bolster, which ends at about the height of the handle (more info on this later)
Handle
The handle, as the name suggests, is the section of the knife that you grip. Knife handles come in all sorts of shapes to offer different grips for different hands. They also come in a variety of materials. The handle can fully encapsulate the tang (hidden tang) or two separate parts that sandwich the knifes tang.
Tang
The tang is the unsharpened part of the knife blade that carries on into the handle. The tang affects the balance, stability and strength of the knife. Some knives have a partial or half tang whereas others have a full tang. (more info on this later)
Rivets
The rivets are the metal pins that have the job of holding the tang to the handle. Usually all knives with a full tang feature rivets, especially those where the tang is exposed by a handle that sandwiches the tang rather than enclosing it
Butt
The butt, also known as the pommel, is the opposite end of the knife to the point. Often the butt has a curve to accommodate your fingers and stop your hand from slipping off the knife adding extra safety. On some knives there features an endcap or “bolster” at the butt of the knife. This adds security and strength to the tang and the handle. Some knives refer to having a double bolster, this means there is a bolster at each end of the handle (the butt and where the handle meets the blade)
Knife Production - Forged vs Stamped
While knife shopping, you’re sure to notice brands talk about forged knives or stamped knives. This isn’t just fancy terminology used to try to make the knife sell itself to you, there truly is a lot to take on board with the difference between Forged and Stamped knives. Forging and stamping of knives refer to the manufacturing process to produce the knives. Each has its own benefits and setbacks which you will soon be able to differentiate. When shopping online, it may be hard to tell from pictures as to which knife is forged or stamped, make sure to read into each range for how they’re produced so you can understand how to use and care for your knife.
On first inspection, forged knives are generally more expensive, crafted by true artisans and are of absolute top quality, whereas stamped knives are ‘just cut out with a cutter’. This used to be the story, but with technological advancements, the quality difference between the two is now minimal.
Forged
Forged knives are knives that have been forged from a single piece of metal. The manufacturing process of forging can be completed in two different ways; hand forging and commercial forging.
Hand forging
Hand forging produces knives that have their own characteristics and are very unique, the processes aren’t repeatable so each knife is a one-off. Hand forging allows the craftsman to add custom details and the result is usually a masterpiece, but quite expensive due to the hours put in. Some Japanese knife manufacturers still hand forge all their knives.
The hand-forging process starts with a billet of steel of varying sorts which is heated up to forging temperature (this differs for each type of steel). The hot steel is then taken to an anvil and hammered into shape. As the steel cools, the knife-to-be is taken back into the forge to be reheated. If the knife isn’t hammered while hot, the steel can snap or fracture which creates a weak knife. After some time hammering, the knifes’ shape and the blade bevel starts to form. This is the last part of the forging process, from here the normalizing process begins. The process of heating and cooling and hammering the blade stresses out the steel, the normalizing process of controlled heating and cooling re-aligns the granular structure of the steel and prevents cracks from forming. When steel is forged, the shape is altered right down to a molecular level, meaning the blade is exceptionally strong. Lastly, the knife is polished, sharpened and a handle is fitted.
Commercial Forging
With the worldwide demand for top-quality forged knives, commercialisation began to speed up the process of hand-forging. This included the introduction of machines and robotics to assist with the always needed human skill to produce a forged knife. The commercial forged knife process begins by producing a mould to manufacture the knife. The steel is then cut to length and heated to the forging temperature determined for the specific steel. A powerful machine press forces the heated steel into the mould to form the basic shape of the knife. The knife is then heated and tempered to achieve the desired hardness. (This can be measured on the Rockwell scale). Up to this point in the production, most steps are completed by machines, it’s the next steps where the human skill is required. The final grinding, cleaning, polishing, sharpening and attaching the handle is all done by craftsmen in the same process as hand forging. So while commercial forging does speed up the process, it is still fully reliant on the labour and skill of expert knife craftsmen.
Forging – Benefits & Drawbacks
The process of forging reshapes the molecules of the steel which makes the steel stronger and less flexible. This strength results in forged knives keeping their edge longer. The lack of flexibility also assists in the sharpening of the knife. The blade doesn’t bend while you’re trying to hold it firmly against a whetstone or a sharpening steel. In some cases, however, the lack of flexibility can be a drawback. If you want a knife that is flexible for your filleting, for example, a forged knife may not be the best option. The only other significant downside of forged knives is the price, but the quality of the knife you’re receiving and the number of skilled hours put into it really justifies it. WÜSTHOF, for example, their forged knives go through 40 different processes and pass through many hands before the knife is ready to be sold while Miyabi takes more than 100 steps and 42 days to create a single knife. The forged process is beneficial to the knife’s sharpness, edge retention, thickness, weight and offers greater durability. In addition to these benefits, the forging process also allows the manufacturers to create a bolster. This can add protection whilst using the knife and prevent your hand from slipping and cutting yourself on the blade. A knife with a bolster is how you can identify that a knife is forged. Any knife that has a bolster is more than likely forged, but not all forged knives necessarily have a bolster, like many Japanese knives.
Stamped
Stamped knives are formed by quite a different manufacturing process than forged knives. Traditionally, a single sheet of steel is cut out into the shape of a blade using a powerful stamping machine. Imagine a giant knife-shaped cookie cutter. The handle is then attached and then the final steps of sharpening & polishing, either by machine or by hand are completed. This process is much quicker than that of a forged knife which is why stamped knives are generally more affordable. Also, since they’re constructed from a single piece of thinner steel, the knife tends to be lighter than forged knives, and as a result, they’re often not as good as forged knives for maintaining their edge. This means sharpening much more often than forged knives.
Stamped knives generally have had a poor reputation, and we can understand why. They’re cheaper, harder to maintain their edge, thinner and more likely for the handle to snap. But, with massive technological advancements in recent years, the stamped knife process has changed dramatically, the production has been refined and many manufacturers now produce knives of equal quality to forged knives. ‘How is this done?’ you ask… Well, not only are the computing processes of the knife design much more advanced and accurate, now the ‘stamping’ process isn’t necessarily stamped. Weird, huh? Now, knives can be laser-cut or cut with a waterjet to extreme precision. The advantage of these new methods is that new dies/cutters aren’t needing to be produced so new shapes and blade sizes can be created on the go and can easily swap from one knife type to another.
Stamping – Benefits & Drawbacks
While stamped knives may be thinner and lighter than forged knives, this isn’t necessarily a downside. With new manufacturing advancements and innovative techniques, stamped knives can now be of extremely high quality and are actually preferred by some chefs due to the lightweight and comfortable feel, as well as now holding an edge comparable to a forged knife. Because of the stamping process, the steel material is always of uniform thickness, from the tip of the blade to the tang in the handle. This means a bolster isn’t often on stamped knives and this is how you can tell if a knife is stamped or forged. Some manufacturers, such as KAI, actually weld a bolster on to increase durability and safety, but not many brands that produce stamped knives do this. Stamped knives that do not have a bolster, the heel of the knife runs straight into the handle. Having a bolster does increase safety, but it is much of a preference to the user.
Stamped knives are inexpensive when compared to forged knives which is great if you’re wanting to create an extensive collection and have knives to handle all tasks. Stamped knives are also more flexible than forged, which is a benefit and drawback. The flexibility can be used to your advantage for tasks such as boning and filleting where flexibility may be needed, but it can be a downside for holding its edge and makes the sharpening process more frequent and harder to complete on whetstones and steels. Electric knife sharpeners are the best option for stamped knives.
Forged vs Stamped
Now, since you’re an expert on manufacturing methods, let’s look further into the differences between each type.
Bolster
We’ll start with the bolster as we’ve already touched on this subject earlier. We know that forged knives more often than not feature a bolster and stamped knives, most of the time do not feature one. A bolster acts as a preventative measure to protect you from cutting your fingers as well as adding strength to the knife at the joining of the blade to the handle.
There are 2 main options for bolsters. Full Bolster & Half / Semi-Bolster
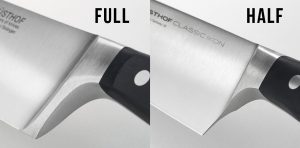
A full bolster as pictured above, starts off from the top of the handle and carries down to the heel of the knife. It is thicker and longer and provides extra protection. A downside of full bolsters compared to half bolsters is that you cannot sharpen the heel of the knife and it takes away this part of the cutting edge. Half or semi-bolsters can either come down partial way of the blade, but not meet at the heel, or it can just create distance between the blade and the handle and not make its way down the blade at all. The benefit of these types of bolsters is that you can sharpen the entire edge, all the way to the heel with ease, but they do not provide as much protection as a full bolster. With proper care and good knife skills, having no full bolster shouldn’t be an issue.
Stamped knives, almost never feature a bolster. Some can be welded on, and if so are likely to be half bolsters to add a little bit of protection.
Blade Thickness
Stamped knives are always of uniform thickness as they are cut out of a single sheet of metal. Forged knives are thicker than stamped and vary in thickness throughout the knife. They can be thin at the tip and the cutting edge and wider at the heel and the spine. The thickest part of a forged knife is generally in the handle (the tang). The added weight of a forged knife makes certain cutting techniques easier such as rocking through hard vegetables or thick meats.
Tang
The tang is the part of the metal blade that extends into the handle. You can get a full tang that extends throughout the handle all the way to the butt or a half-tang / partial-tang that only goes halfway. A full tang adds strength to the knife and makes it more balanced, it is also less likely for the knife’s blade to separate from the handle as the full tang is generally riveted to the handle. Generally, forged knives are full-tang and stamped knives are partial-tang but can also be full-tang.
Weight
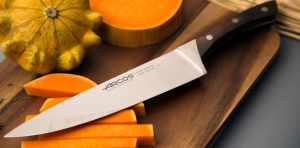
Tang, blade thickness, bolster, & handle material all tie into the weight of the knife. A forged knife is heavier than a stamped knife, and this isn’t necessarily good or bad, but once again down to the user’s preference. A heavy knife can become tedious if you’re going to be using your knife for extended periods of time, this is a reason why some chefs prefer stamped knives as they are lighter and less tiring. Depending on the task you are doing, a lighter knife may be better, but then there’s a good chance it isn’t as balanced in your hand as a forged knife. It’s a fine line between the right weight for the task and the balance of the knife. Finding a knife with just the right weight for your cutting tasks is essential. A heavier knife is helpful when cutting thick foods like pumpkin, watermelon or pineapple, but a light knife is better for smaller, less dense foods. You’re welcome to come in store at Chef’s Complements and have a feel of the knife’s weight and how it suits your hand, our team is here to help!
Blade Flexibility
There is no knife that is necessarily better than the other when it comes to the flexibility between forged knives and stamped knives, it really does depend on the cutting task you are taking out. Forged blades are sturdy and are great at tackling tough cutting tasks, whereas the more flexible blades stamp knives produce are great for utility tasks such as boning and filleting. Stiff blades of forged knives are easier to sharpen with the traditional methods of whetstone and sharpening steel than the flexible stamped knives
Sharpness & Edge Retention
In comparing forged blades and stamped blades in recent years, the gap has significantly reduced in quality of sharpness. Forged knives, with their varying thickness that act as a wedge, are ideal for heavy-duty cutting and chopping tasks, stamped knives with the thinner blade are suitable for lighter chopping and slicing. But this also comes down to the angle each knife has been sharpened too. Angles of less than 15 degrees, most Asian knives, are great for slicing and chopping fine foods while angles over 15 degrees, most European knives, can withstand a bit more force and handle heavy tasks. In terms of holding their edge, forged knives take the gold medal 9 times out of 10. Forged knives with their stronger steel due to the extreme heat and tempering, hold their edge longer than stamped blades, but this just means you need to sharpen your stamped knife’s blade more frequently.
Summary
Both forged and stamped knives each have their benefits and setbacks. If you invest in a top-quality knife, however, it should last you for years and years of cutting. Forged blades are ideal for stable precision cuts and chopping harder and thicker items whereas stamped is great for a lighter weight option that is more flexible and lighter on the wallet.
Types of Knives
No, we’re not just talking about big knives and small knives. We’re cutting deep into each knife style, what it’s used for and why you should have an arsenal of knives at your disposal.
There are more knife styles than you can count on your fingers and toes and each style has a broad range of applications. Some knives are great for certain kitchen tasks while others are not, this is why it’s essential to understand the type of knife and the purpose of what you’ll be using a knife for before you purchase.
Western Style Knives
The Essentials
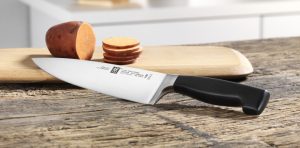
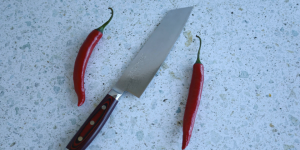
This is our all-rounder knife. The knife that every single kitchen can’t go without. The knife you may actually need a couple of.
A Chef Knife features a long and broad blade (usually 15-30+cm), generally with a straight spine and a curved belly that goes from the wide heel tapering into a fine tip. It is great for chopping and dicing a lot of foods at once due to the rocking action you can achieve through the curved belly. The sturdy and broad heel of the knife can also stand up to heavy-duty tasks such as cutting through tough or thick foods. The chef knife is a true powerhouse in the kitchen and one of the most versatile knives. Perfect for everyday dicing and mincing tasks. If you want to start a collection of top-quality knives, start off with your chef’s knife.
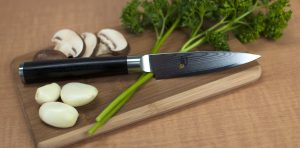
The paring knife, we would recommend, is the 2nd most important knife to have in your collection.
It features a short, slim blade, usually with a pointed tip and is very nimble and allows for accurate and delicate cuts. Paring knives are your go-to for small kitchen tasks, whether it be cutting, slicing or chopping fruits and small vegetables or carrying out tasks like peeling, trimming & de-seeding.
Think of your Chef’s Knife but scaled down a touch.
A Utility Knife is a slightly smaller and slimmer version of a chef’s knife. They essentially act as the same and carry out many of the same tasks, but the small utility knife allows for a bit more control and precision for smaller foods. If you’re dealing with fruit such as an apple, you may want to cut with a smaller knife such as a utility rather than a chef’s. Often you can find utility knives that are serrated which is great for slicing tomatoes and cutting through sandwiches, buns and small loaves of bread.
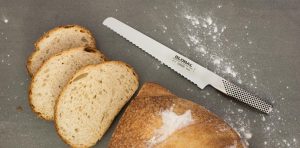
A serrated, saw-like knife. Suitable for taking on more tasks than the name suggests
A bread knife features a long blade with a serrated and sometimes double-serrated edge. It is the perfect tool for gently sawing through loaves of bread as one would easily assume from its name. Bread knives can handle crusty bread, baguettes, bread rolls, buns, bagels and cakes. What’s often not common knowledge, is bread knives can also be used on foods such as heads of lettuce, melons and pineapples.
Knives for Meat
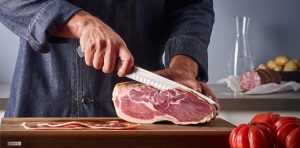
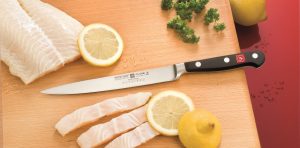
A carving knife features a long and slim blade that tapers up to a sharp point.
Its narrow blade width produces less surface area the knife is touching resulting in less friction as it cuts the food. This means you are left effortlessly slicing through foods with clean, concise and uniform cuts. Carving knives are the best tool for serving meats like poultry, beef or pork due to the thin slices it can yield. It can also be used for similar purposes as a chef’s knife thanks to its long blade and pointed tip, however, we wouldn’t recommend cutting through tough foods as the blade isn’t as broad.
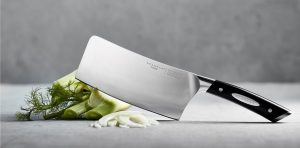
Cleavers, also referred to as choppers, are rectangular and broad blades used to chop through meats
They’re often heavy and can handle heavy-duty chopping tasks such as cutting through gristle & bone. They are great for butchers and a must-have tool for raw-meat prep. The large flat surface can also be used for other kitchen tasks such as crushing garlic against a chopping board.
A boning knife features a very sharp edge and a slim blade that points up to a tip. They’re often short and rigid, but some brands do offer flexible boning knives.
Boning knives are great for cutting meat away from the bone and trimming off the cartilage to prepare your cut of meat. The slim blade allows you to cut right up to the bone and get the most out of your meat without ruining the surrounding flesh. They are designed to be lightweight and easily manoeuvrable.
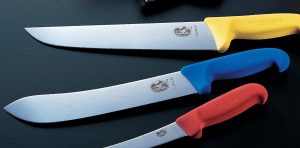
A butcher’s knife is a long, semi-broad knife that curves up to a tip on both the cutting edge and the spine of the knife.
This style of butcher’s knives is commonly only used in commercial butcher operations and handles tough tasks. As well as this bullnose butcher’s knife style, there are also additional knives commercial butchers use such as butchers saws, gut & tripe knives, skinning, slaughter & sticking knives.
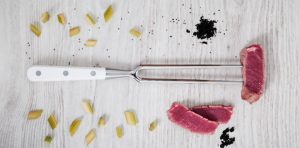
A carving fork usually features two strong tines of around 16cm in length and can be found in straight or bent variations.
A carving fork is used to securely hold meat in its place while you use a carving knife to slice it up. Make sure you always cut downwards or away from the fork, never towards you.
Knives for Fish
A filleting knife features a long, slim and flexible blade that has a very finely pointed tip.
The pointed tip is used for piercing through the skin and allows for intricate and precise bone removal. A filleting and boning knife can look very similar but a filleting knife has a thinner blade that is more flexible. The thin blade delicately slices the flesh of the fish away from the skin and bones to create perfect fillets. A fillet knife is one of the only types of knives where you predominately cut horizontally rather than vertically.
Salmon Knife
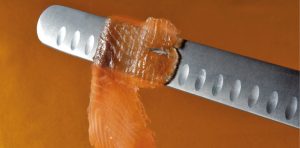
Salmon knives are similar to fillet knives. They feature a flexible thin blade with a double edge but are very long and designed to work with larger fish.
Often, salmon knives have scallops alongside the slim, sharp blade to create air pockets for the fish not to stick to the blade while you’re filleting. The thin blade is slim enough to slice between the fish’s skin and flesh and won’t damage the fish, leaving the chef with clean fillets.
Knives for Vegetables
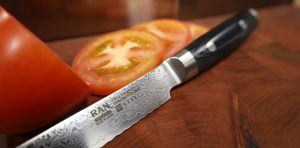
Tomato knives are designed for cutting through delicate skins and soft, fleshy centres.
The serrated edge on a tomato knife cuts easily through soft skins and can provide neat and even slices. Tomato knives can also feature a forked tip and can also be used on cheese boards for items such as salami.

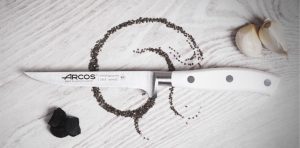
A Peeling knife has a very short, sturdy blade that usually has a slight curve in it, this style is known as a beak edge. You can also get straight edge peeling knives.
A peeling knife is primarily used to peel away the skin from fruit & vegetables such as apples and potatoes. The size of these blades makes for light, nimble work.
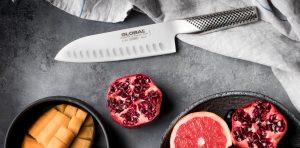
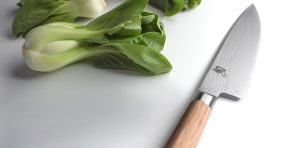
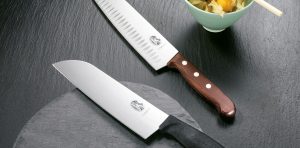
Like a chef’s knife, the santoku is used for just about every cutting job in the kitchen. The name means “three virtues”, depending on who you ask, the name refers either to the three types of foods it works well with—vegetables, proteins, and fruit—or for the three types of cuts at which it excels—slicing, dicing, and chopping.
The straight blade makes this knife perfect for chopping. One of the most popular types of knives in Japan, the santoku has a long, slightly tapered blade with a drop point to allow for more precise, intricate cutting work. Often these knives feature a Granton (or scalloped) blade that eases cutting and helps separate food from the blade. Hollow-ground indentations on the blade help reduce friction so the blade glides through the food more easily. These knives are the Japanese chef’s knife and can handle many tasks including the preparation of sushi and raw fish.
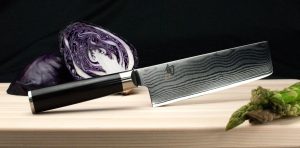
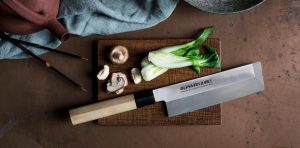
A Nakiri knife is one of the other most popular Japanese style blades. They are also called vegetable knives and look like smaller versions of a meat cleaver.
They have a broad, rectangular shape and are used to chop straight down through vegetables rather than rocking due to its straight edge. A Nakiri knife can handle large vegetables such as pumpkin but also produce thin, even slices from smaller vegetables. They’re also great for shredding cabbages and lettuce.
Usuba
The Usuba has a thin & straight blade for clean, paper-thin slices.
An Usuba Chopper is a traditional Japanese vegetable knife with a single bevel. Single-edged knives can get incredibly sharp and are favoured for precise vegetable work. The straight blade makes cleaning and cutting vegetables even easier as well. Heavier than the Nakiri knife, this Japanese knife is a favourite for Japanese chefs.
The Kiritsuke is a hybrid knife that can be used for multiple purposes, it is a true Japanese-styled knife. It is a hybrid of an Usuba (Vegetable Knife) and a Yanagiba (Slice raw fish for sushi). This makes the Kiritsuke a multi-purpose knife, perfect for preparing Asian cuisine. A Kiritsuke is usually comparable in length or slightly larger than a chef’s knife but features an angled tip like a Yanagiba.
A Chinese Chef’s Knife is a rectangular bladed all-purpose knife that is traditionally used in China and other Asian countries to prepare almost all foods. It’s great for meats, fish and vegetables. Although the shape resembles a traditional western cleaver, this blade is thinner and also lighter. However, this cleaver is not suitable as a meat cleaver, and it is not for breaking bones!

“Yanagiba” means, “willow blade.” The long, thin, willowy blade with the traditional Japanese single-bevel edge is pulled through the food, reducing the loss of the natural juices and creating the cleanest cuts imaginable. The yanagiba is most often used for preparing sashimi, or sliced raw fish, and is excellent for slicing meats and other moist foods as well. The Yanagiba is, quite simply, the ideal slicing knife.
Features of knives
Granton / Scalloped
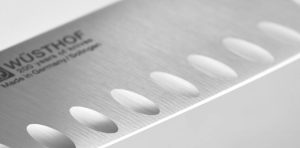
The wording here can confuse quite a few people, including brands and companies also. Granton or Scalloped knives feature semi-circular scallops that are ground into the edge that often appear on either side of the knife and extend from near the cutting edge to the middle of the blade. The purpose of a scalloped edge is to reduce the adhesion of the food to the blade and reduce food from sticking to the blade while you’re cutting. This then provides clean slices that fall away from the blade. Scalloped indentations are commonly found in Japanese produced knives or Asian style knives such as the Santoku or Nakiri. In Western-style knives, these indentations are commonly found on carving/slicing knives, salmon knives, as well as vegetable and cheese knives. Where there can be some confusion in the knife industry, is to do with the terms ‘hollow ground’. Technically, the indentations are hollow ground from the blade, but the term ‘hollow ground’ actually refers to the cross-section of the knife’s cutting edge, which we go into detail further below. The term Granton comes from the first manufacturer to develop this design and patent it in 1928.
Serrated Edge
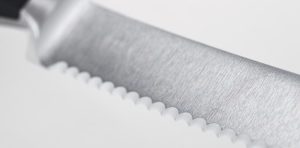
A serrated knife features sharpened grooves and ridges along the length of the blade. This helps cut tougher foods as well as slicing softer foods without crushing them. Bread, Tomato, Cheese, Steak and often Utility knives feature serrated edges
Typical Grinds
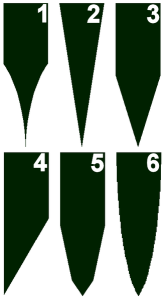 Image from Wikipedia
Hollow
A hollow edge is a concave, bevelled cutting edge. It is an extremely sharp edge but because of this it is weak and needs continual sharpening to keep this exquisite sharpness
Flat
On a flat grind edge, the blade tapers all the way from the spine to the cutting edge on each side. This edge sacrifices edge durability in favour of sharpness.
Sabre
Similar to that of the flat grind, except the bevel starts partway down of the blade. Also referred to as a ‘V’ grind, this offers more strength than a flat grind
Chisel
On a chisel grind, only one side of the blade is ground and the other remains flat. This usually results in a knife with more sharpness than a double bevelled knife. Many Japanese knives, especially those that are designed for the preparation of Japanese cuisine, are chisel ground and Western-style knives often are double-bevelled. Knives that are chisel-ground can come in both left and right-hand variants. The flat side should be on the inside of the cut. Some Japanese knives that are chisel-ground also feature a very subtle concave on the back of the blade to reduce adhesion, this is known as urasuki.
Double Bevel / Compound Bevel
A double bevel grind features a back bevel behind the cutting edge bevel. This bevel keeps the section of the blade behind the edge thinner which improves cutting ability, but this sacrifices sharpness for resilience. Western-knives generally have a double-bevel
Convex
The convex is similar to that of a flat ground, but rather than straight lines from the cutting edge to the spine, the edge is tapered in the opposite curve direction to a hollow grind. This style makes a strong cutting edge as there is a lot of metal behind the edge and it also allows a good degree of sharpness.
What's the best blade materials?
The construction of the knife not only takes a big part in its reliability, but the materials used also affect many factors such as durability, strength, sharpness and how the knife acts and feels. Some materials are better suited for some purposes but each material has there own strengths and weaknesses
Stainless Steel
Stainless steel offers great durability and resists rust and corrosion quite well. The alloy is made using carbon and iron as a base and then chromium is added to repel stains, giving it that stainless steel shiny finish. One problem stainless steel blades do have is the reliability of the steel from the manufacturer. There are a lot of cheap alloys around with poor-quality construction so it is safest to stay away from ‘cheap’ stainless steel knives, especially those of not-known producers or branded in discount stores. You can rest assured knowing all our knives at Chef’s Complements are of top quality and from reputable brands and manufacturers.
Carbon Steel Blades
Carbon steel blades are made with the same carbon and iron base of stainless steel but the chromium isn’t added. Carbon steel is often used for forged knives where extreme strength and durability is needed. Carbon steel blades also do very well with edge retention when cared for. A drawback of the carbon steel blades is they can be subject to discolouration and staining when used with acidic foods due to not having chromium. If you’re after a knife with a sharp edge and holds it well, carbon steel is a great option, but if you’re going to have these knives on display, perhaps stay away from acidic foods.
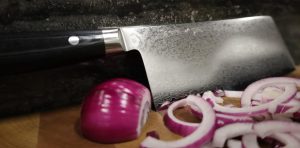
Damascus Steel Blades
Damascus steel originates from medieval Damascus Islamic craftsmen from around 750-945 CE. Damascus steel is made by hammering together multiple different alloys to forge a blade that is extremely strong, durable and sharp and boasts a beautiful appearance. The process for these knives takes longer than standard forged knives, but the strength gained, and the appearance is favoured by many home chefs and knife collectors
Ceramic Blades
Ceramic knives are non-metallic and non-magnetic knives made from hardened zirconium dioxide. They are very lightweight and thought to be more hygienic. Because of the material of ceramic, they can be printed on with patterns or colours. A problem with ceramic knives, however, is their fragility. If dropped, they’re much less forgiving than other materials and can crack, so they must be handled carefully (of course, all knives need to be, but ceramic even more so!). They also need special sharpening tools, as standard whetstones will damage the blade.
Titanium Blades
Titanium is one of the hardest materials known to man. It is non-magnetic and rust-resistant, making it ideal for outdoor knives. However, titanium is less sharp and doesn’t hold its edge well, so it’s less effective than other materials.
Japanese Knives vs European Knives
The majority of kitchen knives fall into two main categories. Japanese-made and Western/German-made. The difference between the two, apart from the physical appearance, is primarily down to the steel hardness and the edge angle. Many knife manufacturers produce both Japanese-style and Western-style knives. Knives can feature Western-style handles and blades or Japanese-style handles and blades or a combination of either. Many European manufacturers produce Asian-style blades such as the Santoku, while Japanese craftsmen also produce chef’s knives and have ranges with western-styled handles.
Japanese knives are often made from steel that contains more carbon. This results in harder steel, and the edge can be cut at a finer angle but is more brittle. Western-style blades are softer than Japanese knives and are capable of holding an edge longer. This means they don’t need to be sharpened as often. Japanese knives have a finer angle varying between 15-16 degrees compared to 20 degrees in most western-style knives. Japanese knives are usually sharpened by hand also whereas western knives are often finished with a machine. The cutting edge on a Japanese blade is straighter so you can produce clean, precise cuts and Western blades are more curved to allow for cutting with a rocking motion. With a bolster and full tang, Western knives are weighty, durable and designed to chop, cut and slice. Japanese knives usually don’t have a full tang or bolster so are lighter and are prominently for precision slicing.
Asian Style
As we’ve gone over in ‘Types of Knives’ there are many Asian styles of knives. Just because a knife is an Asian style, it doesn’t mean it can’t be produced in a European brand. The most common Asian Style knives, the Santoku and the Nakiri are very often found made by European manufacturers. For example, Zwilling and WÜSTHOF both German brands, both produce Nakiri knives and almost every knife brand will feature a santoku, it is one of the fastest-growing knives in popularity.
Cutting Techniques & Terminology
Grip & Cutting Techniques
The Handshake & The Pinch
The handshake grip and the pinch grip are both common methods of holding a knife. The handshake grip, which most of us do naturally without realising, is holding the knife as if we are shaking someone’s hand. It is the strongest knife grip, but what you gain in strength, you lack in precision. The pinch grip, you pinch the blade just past the bolster (or where the bolster would be on a stamped knife) with your forefinger and thumb and then wrap your three other fingers around the handle. The pinch grip offers you more control and precision when cutting so professional chefs often opt for this method when accuracy is needed.
The Claw Grip
The hand that is not holding the knife is used for the claw grip. Bend your fingertips slightly under so that they cannot be hit by the blade. You can use your thumb in two ways:
- to move ingredients that have slipped out of position
- to hold the ingredients on the cutting board
To cut, you now use your protruding knuckles as a starting point. Keep the blade vertical so that it just brushes your knuckles. The tip of the knife rests on the cutting board while you continue to guide the blade rhythmically up and down past your fingers. Since your fingertips, making the claw, just rest lightly on the ingredients, you can pull them back slightly, bit by bit, in time with the blade. This also allows your fingertips to help you improve the spacing between each cut. The Claw Grip ensures that the hand that is not holding the knife is never at risk. An added bonus: you not only work more safely with the claw grip but also much faster.
Cross Chop
The cross chop is the perfect cutting method when you want to quickly cut small vegetables and herbs and aren’t worried about presentation. To Cross Chop, simply hold the knife with one hand and put the palm of your other hand on the spine of the blade. Keep the tip of the blade down on the cutting board and lift the handle of the blade to chop. This method provides quick chopping and keeps hands safe.
Rock Chop
The Rock Chop is similar to the cross chop. Instead of having a hand on the spine of the knife, use your off-knife hand to move the ingredient you are chopping. This keeps the knife stationary and only the food is moving. Make sure to apply the claw grip!
The Locomotive
The locomotive cutting technique, or as some like to call it, the ‘Choo Choo’, is a cutting style that when paired with the claw grip, can be very safe and efficient. When cutting with the locomotive style, the tip of your blade must always be in contact with the chopping board. Your knife holding hand, then makes small circular motions as you would see like the wheels on a locomotive with the knife. This is a great technique for amateur chefs to learn as it provides safety to all your fingers and is great for all smaller cutting tasks where too much strength isn’t required.
Types of Cuts
Julienne Cut
The Julienne Cut is a very fine cut where the thickness of each slice is between 1-2mm. At Chef’s Complements, we do have tools to create easy julienne strips but it is also attainable with quality knives. Slice your vegetable into 1-2mm strips then turn the strip over and cut again into 1-2mm to create a very thin match stick shape. This cut is usually seen in carrots and celery but you can also use it to create tin fries out of potatoes.
Brunoise Dice
The Brunoise dice is just one step further than a julienne cut. Once you have completed your julienne strip, cut once again to create cubes of 2x2x2mm. The Brunoise Dice is the smallest dicing cut and is popularly used for soups
Small Dice
To the eye, it’s hard to tell the difference between a small dice and a brunoise dice. A small dice follows the exact same procedures as a Brunoise dice but is 3x3x3mm.
The Batonnet
The batonnet technique is used to cut baton-shaped vegetables. They measure approximately 6mm x 6mm x 6cm. Make sure to always cut the same size for uniformity.
The Baton
The baton is a slightly larger version of the batonnet, it is 12mm x 12mm x6cm. This is not a very common cutting size.
Pont-Neuf
The Pont-Neuf cutting size is only related to cutting potatoes. After the potatoes have been skinned and washed, cut your potatoes to 2cm x 7cm to create chunky chip shapes.
Do's & Don'ts
To make your knife last a lifetime there are many things you should and shouldn’t be doing with your knife.
Cleaning
DON’T leave your knives in the sink to get to later and DON’T wash them in the dishwasher! Not putting your knife in the dishwasher is the number 1 rule for knife care. Although some brands do say their knife is dishwasher safe, in theory, that is true, BUT it doesn’t mean it’s what is best for it. The high temperatures can warp the knife or parts moving around could damage the blade. Also, leaving knives in the dishwasher can be dangerous when unloading. This is also the same for leaving your knives in the sink. An unknowing hand could reach into soapy or murky water and easily cut their fingers. Also, knives being left in water for prolonged periods of time can lead to rusting. DO wash your knife by hand after use. Clean in warm soapy water with a brush or sponge and clean with the knife and the cutting edge facing away from you. If using a sponge, wrap it around the spine of the knife, not the cutting edge.
Chopping Surface
DON’T cut straight on the benchtop or use a glass chopping board! Chopping on any surface that’s harder than the blade can damage your knife’s edge. DO use a wooden or plastic chopping board, even if you’re only using your knife for a few cuts, don’t become a victim of an unnecessary chip in the blade
Storing
DON’T store your knives unprotected or wet! Putting a knife away straight after cleaning without drying can lead to rust forming on the blade. Knives stored in drawers unprotected are a BIG NO! If you want to keep your knives in a drawer, DO think of purchasing an in-drawer knife holder or knife guards. Other options are benchtop knife blocks or magnetic knife racks. (More below)
A Sharp Knife
DON’T use your knife if it has a dull edge! A dull knife is a dangerous knife. DO make sure your knife is always sharp. See how to sharpen your knife below.
Other uses
DON’T use your knife as a can opener, for opening boxes or use the wrong knife for the task. Using your knife incorrectly can not only damage the blade, but can be a risk to the user. DO make sure you have the right knife for what you’re needing it for. DON’T scoop up ingredients onto the blade surface with the cutting edge of the knife! Make sure you always use the spine of the knife. This is to protect the cutting edge from blunting as well as saving your fingers.
Choosing the right cutting board
We’ve all done it. We’re just cutting one apple up or one slice of cheese, why do I need to get a cutting board out? Cutting straight on the benchtop is up there with one of the worst things to do for your knife. Chopping on any surface that’s harder than the blade can damage your knife’s edge. That includes benchtops of any variety, stone, laminate, metal, marble or granite as well as glass cutting boards. Make sure you always use a quality chopping board of an appropriate material to minimise the risk of damaging your knife.
When choosing a cutting board for yourself, there are many factors that you should consider:
- Do you want a matching set or a variety of different boards?
- Do you want a board that is dishwasher safe?
- What will you be cutting and how frequently? This affects how many boards you need and the size
- What material are you after?
- How much are you willing to spend?
Material
Wooden Cutting Boards
Wooden cutting boards can be categorised into edge grain and end grain. Edge grain cutting boards are made from wood that has been cut with the grain. This means that the long wood fibres show on the surface of the board. Edge grain boards are usually the most affordable type of wood cutting board because they’re easier to produce and are more common. End grain chopping boards are produced by gluing cross-section pieces of wood together with the rings showing on the cutting surface. End grain boards are thicker than edge grain boards and are gentle on knives.
With all wooden chopping boards, keeping them dry is very important. Wood is quite absorbent and if left repeatedly wet, the wood can expand and leave small gaps for bacteria to live in. Make sure you condition your wood boards with mineral oil. This can help prevent cracks and reduce boards absorbing moisture. It obviously makes sense that if prolonged use in water is bad, then cleaning in a dishwasher is also. The high heat, harsh detergents and water can harm your board. Make sure to wash your wooden board by hand with dish soap and wipe dry. Leave it out to air dry on its side. Make sure not to submerge your wooden board in water for too long when hand washing either, a dunk is fine but a soak isn’t advised!
Bamboo Cutting Boards
Bamboo cutting boards are an environmentally friendly option and are usually also quite affordable. Bamboo is a sustainable and fast-growing material, it is lightweight and if cared for, can last for years of use. Bamboo is harder than wood so it can be dull your knife’s edge faster than wood. Bamboo cutting boards also come in both edge and end grain and are cared for exactly the same as wood boards.
Composite Cutting Boards
Composite boards such as Epicurean boards, are made from wood fibre composite and are durable, non-porous, knife-friendly, lightweight and dishwasher safe. Oh, and environmentally friendly.
Plastic Cutting Boards
Plastic cutting boards are great for styling a kitchen as they often come in various colours and shapes and can be purchased in a set with a storage case. Plastic chopping boards aren’t as much of a heirloom piece as wood cutting boards, as they don’t generally last as long as wood. Plastic boards usually are softer than wood which is great for keeping the knife’s edge intact but eventually the board starts to look worse for wear. The scarring can’t be repaired on plastic boards as easy as wooden boards and these mini grooves can harbour bacteria. When your board has many cuts all over, it becomes harder to thoroughly clean, if the surface is starting to look or feel rough, it’s time to replace it. It’s also important to remember that plastic is man-made and can be of any construction or material. Make sure you look out for a board that is made from high-quality material and is food-safe. You can also get very thin plastic cutting boards that are flexible. These might not last you the longest but are great at transporting food by bending the board and funnelling it into where you need the ingredients to go.
Features
Juice Groove: If you’re a bit over meat juices dripping onto your counter, adding a specific board to your collection with a grooved edge is a wise choice.
Non-slip feet: Non-slip feet on the bottom of boards can be great to stop your board from sliding when in use. While it’s not a necessity, it can be helpful.
Handles: Cutting boards with handles are quite multi-purpose. While they can be used for transportation and easy handling, they can also be used to hang to store. Sometimes food can fall through the handle which could be frustrating, but we can actually use this to our advantage. If you’ve cut food up small enough, you can actually transport your board over a bowl, or pot/pan and use the spine of your knife to guide the food through the cut-out handle. This is a fool-proof method not to drop any of your ingredients.
Final Considerations
It’s handy to have a variety of different cutting boards for different tasks. If you have coloured plastic cutting boards, these are great to reduce cross-contamination. We also sell boards that have identification tabs to help you remember. Not only is having a range of cutting boards great to reduce cross-contamination but having boards of different sizes can also be very handy to have. A small board for the previously mentioned apple or slice of cheese, (also great as a bar board) and larger boards for preparing meats and large vegetables. Depending on your height, this can also influence which board you may need. If you are tall, you may want a thicker board that brings your work surface closer to you so you don’t have to bend over as much and have more control. The material of the board and the frequency and purposes you will be using it for are the main considerations when buying a board or set.
How to Sharpen
Maintaining a sharp edge on your blade is essential to an efficient and safe knife. There are many different ways to sharpen and hone your knife. In the end, it comes down to quite a few different factors as to which is best for your knives and what is best for you. Depending on the bevel of the knife, the blade angle, if it’s serrated and your skill levels or sharpening preference, a certain sharpener may be the right call for you.
Considerations
Bevel Type
Further up in this article, we discussed the different common bevel types/grinds. Knowing what type of bevel your knives have can help assist with your choice of a sharpener. Some sharpeners such as electric sharpeners allow for 1 or 2 different bevel styles. If you have a set of authentic Japanese knives for example that are a chisel bevel (only ground on one edge), you will need to use a whetstone. Understanding your bevel type is important before buying a sharpener
Blade Angles
Depending on the style of the knife, Japanese or Western, as well as the purpose of the knife, the angle the blade is sharpened can differ. Most commonly, kitchen knives are sharpened to 20-degrees, this is referring to the degrees on each side of the blade eg. a 20-degree cutting edge would have a total angle of 40-degrees. The greater the blade angle is, the stronger the knife is, but you do lose a bit of sharpness. Knives that need a lot of force for chopping such as cleavers have a great angle of 30-35 degrees per side. Most kitchen knives are around 18-20 degree angles. This creates a balance between having a durable blade while also having a sharp cutting edge. Knives that are required to be super sharp such as filleting and paring knives have an angle less than that of around 12-18 degrees. This creates a weak edge but is exceptional at fine slicing. Most electric and handheld sharpeners have set angles of around 15-20 degrees to cater for a majority of kitchen knives. If you have a blade type outside 15-20 degrees, you may need to use a whetstone or sharpening steel to achieve your desired results.
Whetstones are a very common and traditional way to sharpen your knife. You can control the angle and can sharpen a variety of bevel styles. Getting the correct angle to start with and keeping it the same throughout the sharpening process is the most vital component of using a whetstone. A good practice is to hold your knife straight down on a 90-degree angle to the whetstone, halve it to get to a 45-degree angle. From there, depending on what angle you are trying to achieve for your knife, move the knife just over half to get to a 20-degree angle or down to a third to get to a 15-degree angle. You can always slightly adjust the angle depending on what you think may suit your cutting style. If getting to the right angle and keeping it there may be a hard task for you, you can always look into whetstone guide rails that ensure you get an even cutting edge at the right angle.
Once you’ve found the correct angle for your particular knife, you can begin the sharpening process. Make sure to always read the specific instructions for your stone as there can be different techniques for different styles of stones/whetstones. Always start with the coarser grit whetstone (lower number) as this is the best way to quickly get your blade back into its correct shape.
- Lubricate your stone making sure to follow the manufacturer’s instructions when doing this first step. Some stones only need to be soaked for a couple of minutes while others could be 15-20 minutes, usually the coarser the whetstone the longer it soaks. Diamond stones may not need any soaking at all.
- If you don’t have a non-slip whetstone base, put your sharpening stone on a moist towel on top of a flat surface.
- Begin sharpening with your knife at the set angle. Slowly draw the knife from the tip of the knife to the heel down and across the stone in a smooth motion
- Repeat this motion about five times or however many you feel is necessary to get your blade into shape.
- Reverse your knife and follow the same process on the other side of the blade. For consistency, make sure to sharpen each side with the same amount of strokes.
- Now, flip the knife back around and reverse this motion, slowly sharpen from the heel to the tip about 5 times. Once this is complete, flip the knife back over and repeat on the other side
- If you have a finer grit whetstone, repeat this process again.
Over time, a knife’s edge will dull with use. Using a honing steel will restore dull knives back to razor sharpness.
Instructions for use
Method 1: Hold the sharpening steel vertically over a non-slip base. The tip of the blade should point upward. Move the blade from bolster to point at an angle of about 22° with slight pressure over the steel. Move the arm but not the wrist.
Method 2: Hold the sharpening steel at arm’s length in front of you. The blade is drawn at an angle of approximately 22° against the steel. The sharpening is done perfectly when both sides of the blade from bolster to tip alternatingly glide over the full length of the steel.
Check out our GLOBAL Care Guide for some more instructions and videos on how to sharpen GLOBAL knives with a steel
Electric sharpeners are great for amateur home & hobby cooks. There are a variety of options available that can cater to multiple angle types, as well as offering sharpening and honing methods. Some can even assist in sharpening serrated knives. Ensure to follow the instructions included with your specific sharpener, as all models will feature different methods to get your knife back to pristine condition.
Pull-through sharpeners are also a great, inexpensive way for home cooks to sharpen their knives. Much like electric sharpeners, there are many options to suit the style of knife you may have. Many of these handheld sharpeners feature 2 or 3 stages to sharpen your knife and then hone and polish it. You can keep your knife in top condition by giving it a hone before use, this will reduce how often you may need to sharpen it. Make sure to follow your sharpener’s instructions regarding how many times to pull through or if your sharpener requires water, like the GLOBAL water wheel sharpeners.
Great for taking on the go, mini sharpeners and pocket sharpeners are great for hunters and fishermen or to keep nearby at the BBQ. Because of their small size, they are great for sharpening pocket knives. If you have an outdoor entertaining area where you may use a knife, it can be handy to keep one of these in a drawer nearby or on your BBQ apron.
How to Store
After you’ve spent the time to sharpen and hone your knives, make sure you store them correctly so that they stay sharp for longer. As you know, storing your knives loose in a drawer is essentially a crime. Let’s take a look at alternative knife storage methods that are safer for you and protect your blades.

A magnetic knife rack – also called a magnetic strip or magnet knife holder – is a great choice if you don’t have much counter space for knife storage. A magnetic knife holder can conveniently be installed on a wall close to your cooking preparation area making your best kitchen knives easily up for grab while also on display. At Chef’s Complements, we carry quality magnetic knife holders in different lengths, materials & finishes, while others even double as a shelf.
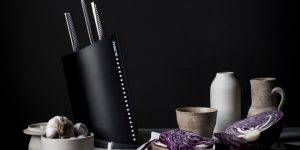
Knife blocks are also a great option for storing knives on the countertop, right where you need them. Storage blocks come in a variety of styles and shapes and can accommodate an extensive collection of knives. Some knife blocks feature set slots to store a limited number of knives, others feature wide rows that can fit multiple knives. There’s also the innovative style of tightly packed polypropylene brush such as the Peer Sorensen iBLOCK and the Scanpan Spectrum Uni Blocks that allow you to place your knife in anywhere. If you’re looking to upgrade your knives and need a knife block, consider buying a knife block set. This is great value for money and allows you to buy blocks that aren’t available separately.
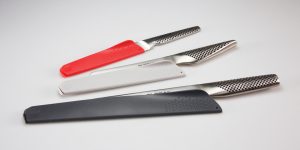
Knife guards are an affordable option that allow you to store your knives safely in the drawer. Guards come in multiple sizes to fit all styles of knives and blade lengths.
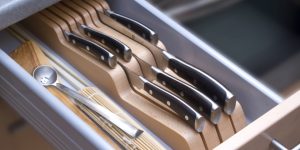
In-Drawer Knife Blocks are gaining popularity as a storage option for knives. They perfectly house your knife as a knife block would, but allow you to store them horizontally in a drawer. This is great for smaller kitchens where countertop space is hard to come by, and it’s also great for storing additional knives you don’t use as often that don’t fit on your magnetic rack.
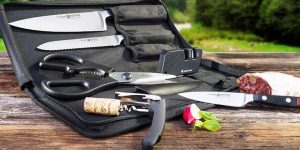
Knife Rolls, Knife Bags & Knife Cases are great storage options for professional chefs or those who need to take their knives on the go. A knife roll can be a perfect transport method for a fisherman who wants to take their filleting knife, fishbone tweezers, oyster shucker, fish knife & slicing knife onto the boat. Using knife guards adds another layer of safety for the knives inside the knife roll in case they slip out of the pocket and damage other knives.